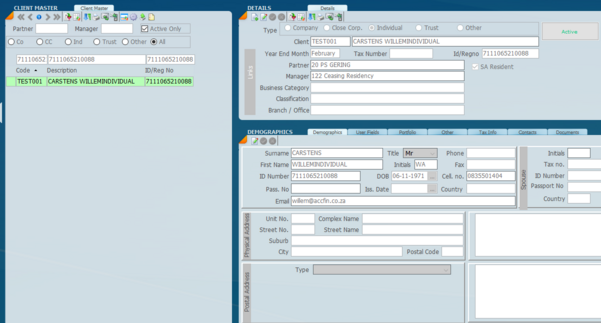
1. Go into Masters->Clients and filter on the clients you want to send the document to.
In this case I used only one client.
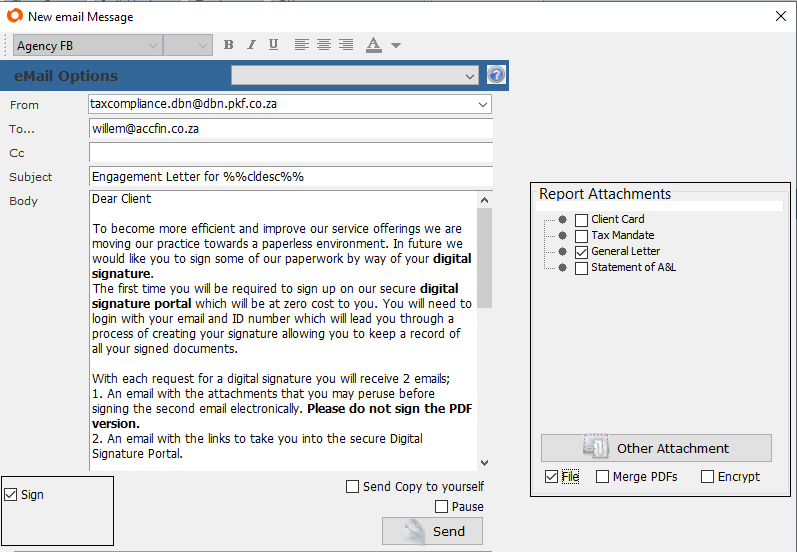
2. Select the email option and make sure that both file and sign are ticked. Also make sure that you select an attachment that needs to be signed.
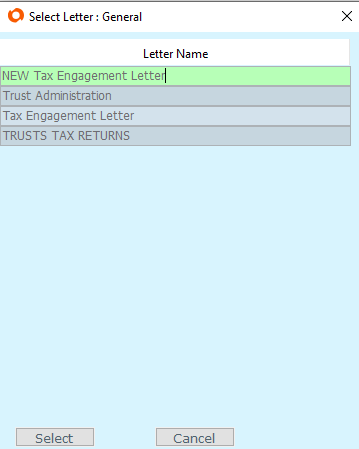
3. Select the letter you want to get signed and click on the send button.
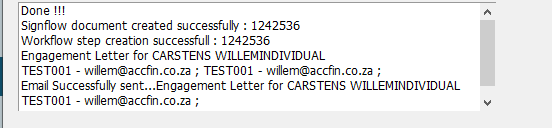
4. The information box on the screen will show 2 statuses. One for the email to client and the second for the creation of the document at Signflow. It must show document created successfully.
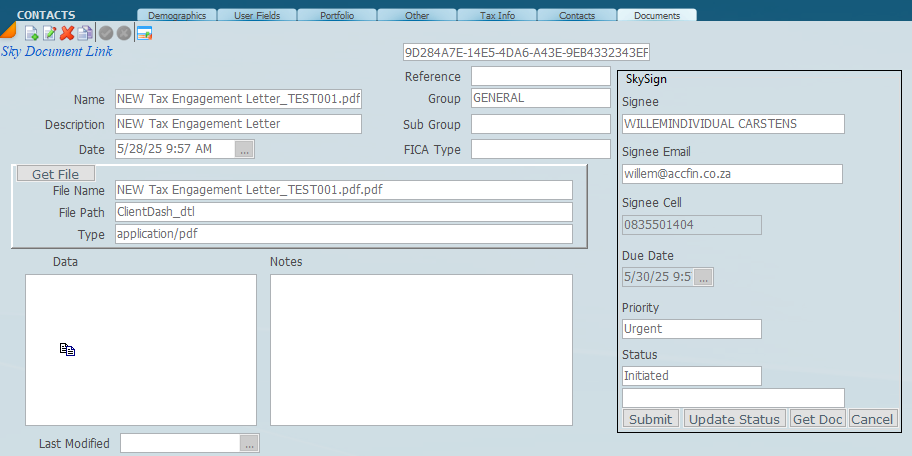
5. After the document has been created it can be viewed under the document tab for the client. The first status of the document will be in Initiated
6. If you log into Signflow the document will also show there.
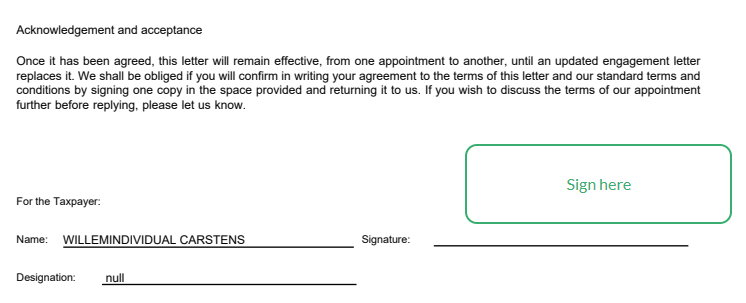
7. When the client logs in the document will have a place for them to sign.
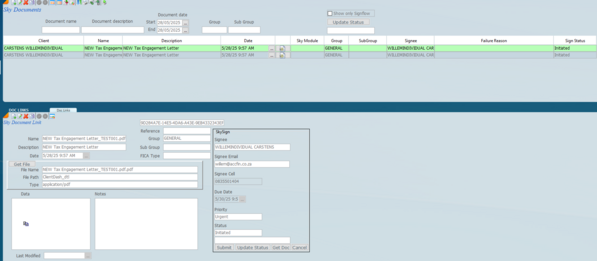
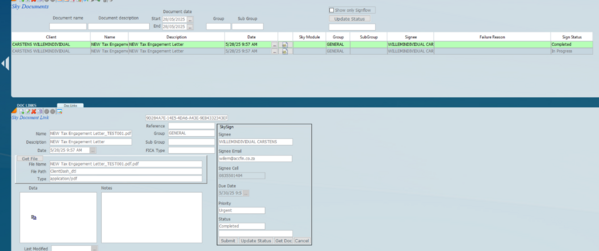
8. To keep track on the document status go into masters->documents.
9. Here you can filter on numerous fields including the status of the documents. I used the dates filter to show todays ones. Notice both are showing as Initiated.
10. I clicked on the update status button and you can now see that the document that was signed now shows as completed.
11. You can now download the signed document into the system, by clicking on the Get Doc button.
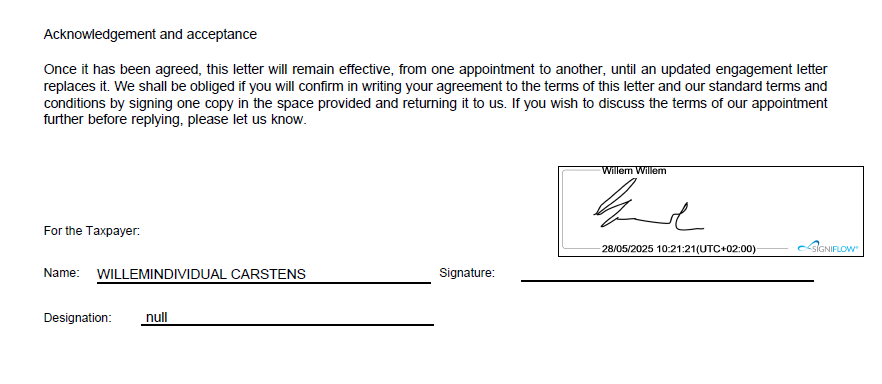
12. After downloading the document you can view the document and see the signature.
If the client does not want to sign the document or the document was sent inerro you can click on the Cancel button to stop Signflow sending out reminders for the document.