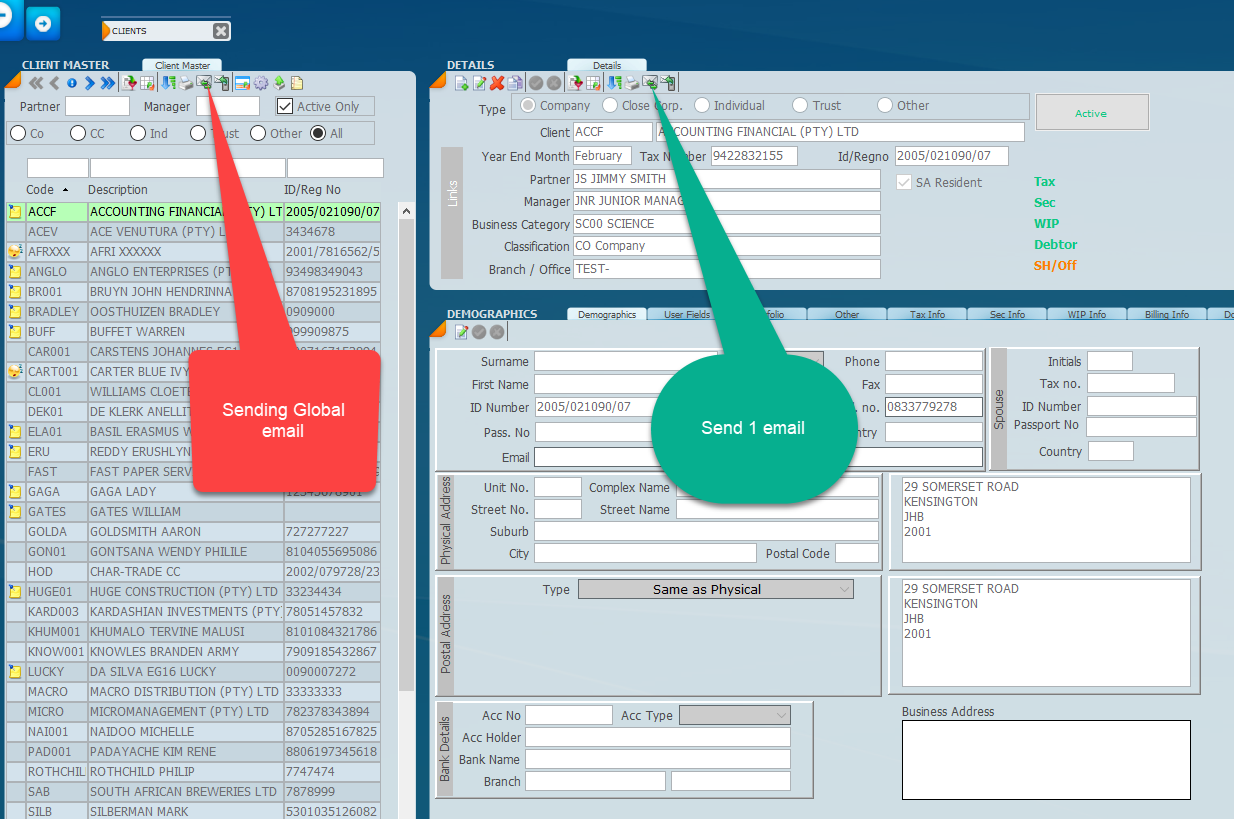
1. The screen below reflects the Client file screen. We have a list of clients displayed on the screen on the left-hand panel. These are the clients that we are going to be emailing in order to obtain their mandate for mandate approval.
2. There are two ways that we can send the e-mail to the clients. We can either click on the e-mail icon on the top left-hand side which will generate the e-mails in bulk for all the clients that are listed, or we can do it one at a time by selecting the client in the list panel on the left and then clicking on the e-mail icon on the top right-hand side. Refer to the arrows above. When starting off test one at a time.
3. It is imperative that you set up a meaningful encouraging front end e-mail to send to your clients so that they can sign-on to the digital signature portal. In order to see the setup and how this works click on Email Message Template.
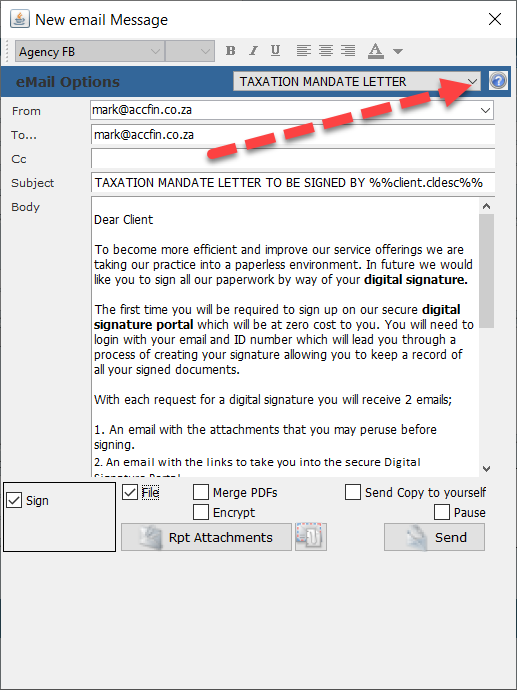
4. The screen above shows the front end email selected. It is now necessary for you to send the e-mail by creating a situation so that the client will receive the first e-mail with instructions and the attachments for perusal and the second e-mail to take the client to the secure digital portal. Once you click on Send, the emails will automatically be generated. In order to send this e-mail, you should click on the check boxes File, Sign, Merge (if more then one document) as shown above and if you wish the e-mail to be sent to yourself check send copy to yourself.
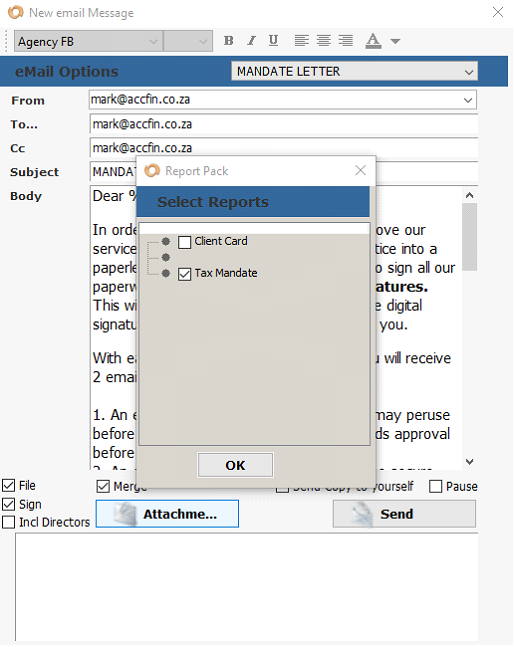
5. Click on attachments and select the letter you want to send to the client, in this case a tax mandate letter.
6. And then once you have done this, click on send. The Merge option will take each page of the documents in the attachments and combine them into one PDF File of multiple pages.
7. Once you click on the send button you will notice a message at the bottom of the screen which says processing. On the successfully processing of the e-mail with the attachments the message in the box at the bottom will display indicating that the emails have been sent successfully. If you are sending out the e-mails in bulk, then as each e-mail is sent it will display in the box at the bottom
indicating that it is successful.
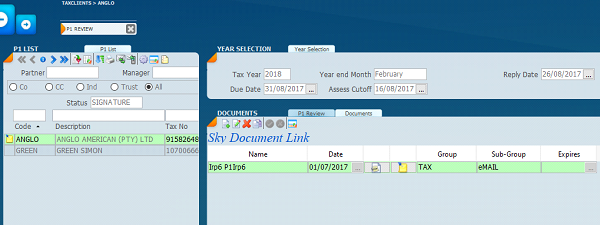
If you click on the Documents Tab of the review screen the attached document sent out in the email will display. To see the contents of the document click on
8. If you click on the change view icon , the screen will change to that indicated below and you will be able to see the status of the digital signature and have the ability to open the document sent.
9. You will notice the various defaults on the right-hand side above. The system indicates the e-mail address that the attached documents went to, as well as other bits of information. At the bottom, you have got priority which says normal at this stage, and the status says Initiated. This means that the Digital Signature has been activated. There is a data box with a small icon of two miniature pages. If you click on this icon the PDF form that you have sent to your client will open. At this point it will not be signed because the process has just been initiated and not completed by the client. When the update status button is clicked the status word will change to in progress and will eventually change to completed when the client signs the document. When you click on the Get Doc button the signed form will replace the original blank form in the database. If you click on the data box the PDF Form will be loaded with all the pages and the signature in place.